 |
| Quickly basking (SPOILER, new tank) |
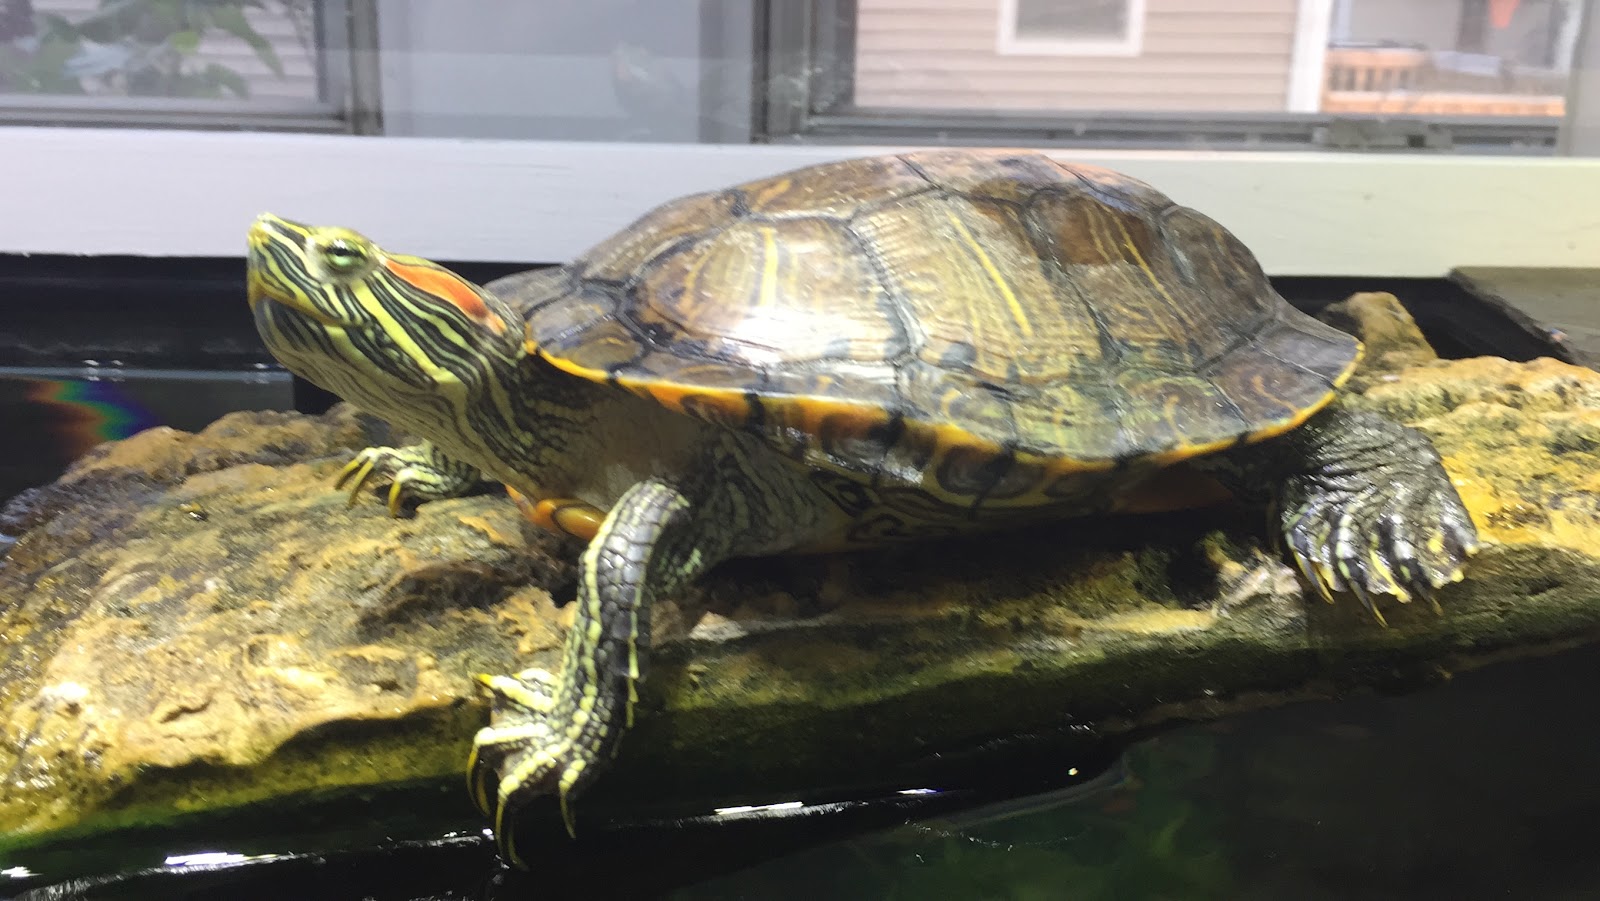
When I met Quickly, he was living in a 20 gallon aquarium, and had outgrown it. When we moved in together, we upsized him to a 50 gallon tank. That seemed like plenty. But he kept growing, and we began to realize that he really didn't have enough space, the tank was difficult to keep clean (turtles are messy!) and he didn't have any stimulation. This became really apparent when we moved his tank out of the den during some renovations. He was right there with us as we'd eat dinner, and we started to plan a new tank.
 |
| Here he is in his 50 gallon tank. Not enough space for a turtle. |
 |
| Steel stand in process of being sanded and repainted |
I planned to drill the tank for overflows (I'm a reef guy at heart) and have a sump, so I needed to get that done first. I've drilled holes in tanks a few times before, but never something this big (or expensive). But the standard stuff about drilling glass applied, going slow, don't push, etc, etc. I have a right-angle Milwaukee drill that is about 200x overmatched for this job, so that was obviously the one I used!
 |
| Like a donut hole, but glass |
 |
| Big drill w/ diamond bit |
 |
| Three holes, zero cracked tanks |
Alright! Three holes, no cracks, things looking good! Previous owner had painted the back glass black, I removed that. You'll notice the leaves on the driveway, this is October of 2015. This project took a very long time, and I am very happy that it took its sweet time to snow that year! Since I wasn't liking the stand that I'd received along with this tank, I had to build my own. I was comfortable building a strong stand. The 240 gallon reef tank I built in 2011 is doing fine, the stand is rock solid, the engineermanship is sound. But that stand is hidden, built into a wall, and not finished in any sort of furniture-grade style. This one would need to be. Furthermore, we wanted the maximum amount of swimming area for Quickly, so his basking area would be above the main tank.
 |
| Sketchup makes neat drawings! |
The previous owner of the tank had included the terrible metal stand, which takes up space in my driveway even as I type this, but he'd also given me a 4 foot LED lighting fixture. Not enough to grow plants, but enough to light the tank not under the basking platform. Basically, perfect for a turtle tank.
Again, thanks Mother Nature for not snowing me in and preventing this build!
 |
| 2x4 and 2x8 construction, sheathed in plywood. The plywood on the back extends down about 12". |

 The doors are glued and pocket-screwed together, with the center panel dadoed to accept some pine paneling pieces. I really like how these came out.
The tricky part was cutting the plywood that I planned to use on the front of the cabinet to accept these panels. I initially tried using a thin-kerf circular saw, but found that the blade wandered enough to absolutely wreck the cut out, and I had to start over. Similar variances happened when I tested using a jigsaw and a regular kerf saw. Starting fresh, I ended up creating a jig and then using a router with a bearing to follow the jig and cut the opening PERFECTLY. Should have done it that way to start.
 |
| Hallelujah, perfect fit! |
That almost immediately failed, as the boards began to dry out unevenly and cupped up like crazy. Then I weighted the top down with buckets of water overnight to straighten the top out, one bucket leaked, dissolved the glue, and the piece came apart. That was... Frustrating.
So back to the hardware store I went, and purchased a flat, solid wood door. The door was about 18" too long, so I sliced it down. Turns out 'solid wood' is one of those marketing terms. Yes, what was inside that door is technically wood, in the same sense that a hotdog is technically beef. It was a very chippy, sawdusty mess! So I then had to cut it down more and attach a 'real wood' end and back piece. Wouldn't matter for looks, as it was being painted, but it sure did put me in a bad mood, as I was probably about $400 into wood just for the stand top, and it was taking weeks to get it ready. But then, just like that, it was done!
 |
| Waddya mean we need to get this into the house? |
 |
| Looking in from outside... Tank stand! |
 All told, the tank plus stand plus water plus rocks plus sump plus whatever was going to approach 3000 pounds. I knew the direction of the
 joists, their span, etc. The tank is only a few feet from a foundation wall. It's unlikely that there would be a problem even if I did nothing. BUT, it's perched on a stone floor, and even a little flex is likely to crack the slate. So I added a 4x4 reinforcement to the basement below the tank. It's belt and suspenders.
Or I hope it is!
It took until January 10 before it was finally time to wrassle the tank into the house. No white Christmas this year, no snow to speak of. Last year the tank would have been under a foot of ice and snow, but not this time. I'd managed to find my suction-based lifting handles, so the wrangling wasn't nearly as bad as getting the thing into and out of the minivan. But finally, the tank was in the house, no more worries about the weather, and phase two could commence!
 |
| Leak check! Buying on Craiglist and not testing anything for three months could have gone - badly. All OK! |
Part 2 to follow!

No comments:
Post a Comment